Upgrade RED ROCKET Firmware
On Mac OS X, the driver must be installed before upgrading the firmware; otherwise the firmware upgrade fails. To upgrade the RED ROCKET firmware, follow the instructions below:
-
Ensure that you have already downloaded the RED ROCKET Installer. For more information about how to download the RED ROCKET Installer, go to Download Driver and Firmware.
-
Open the folder on your desktop that contains the downloaded firmware.
-
Open the Install_Firmware file.
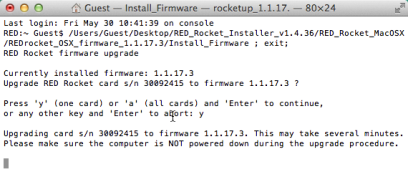
A terminal window (Mac) or command window (Windows) opens. The following information displays:
-
Your RED ROCKET serial number.
-
Current firmware version.
-
The firmware version to be installed.
-
-
Respond to the prompt to confirm which boards (cards) to install:
-
To upgrade one RED ROCKET: Type Y and press Enter.
-
To upgrade all RED ROCKETs: Type A and press Enter.
-
To cancel the upgrade: Press any other key and press Enter.
The upgrade process begins, and may take several minutes.

Figure: Install Firmware
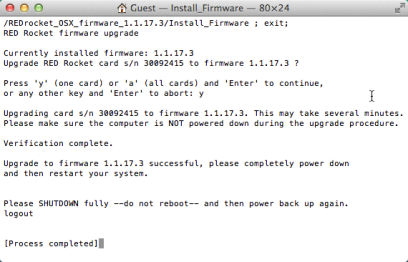
After the firmware is upgraded, you are prompted to fully shut down the computer and power back up again.

Figure: Install Firmware
-
-
Close the terminal/command window.
-
Shut down the computer. DO NOT simply restart the computer.
-
If the RED ROCKET is in a Thunderbolt chassis, disconnect power from the Thunderbolt chassis after the computer fully shuts down.
-
Wait a minimum of 60 seconds.
-
If the RED ROCKET is in a Thunderbolt chassis, power up the Thunderbolt chassis.
-
Start the computer.
-
To verify that the system recognizes the RED ROCKET, go to Validate RED ROCKET Installation.